This resource instructs teachers on how to create a meeting in Learning Tree.
NOTE: Click here for an overview of Meetings as a teacher and a student in Learning Tree.
IMPORTANT: Meetings integration via Zoom takes place at the tenant level. If you do not see the Meetings option, your tenant does not have meeting integration.
Where Can You Create a Meeting?
If your tenant has Zoom meeting integration, you can create a meeting in the following places:
The process to create a meeting in these areas is the same, but the access is different.
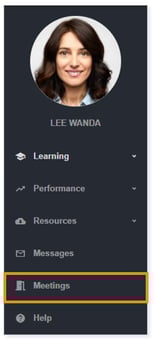
Main Menu
In your Main Menu, select Meetings.
TIP: This Meetings option is great if an administrator would like to hold a staff meeting. Teachers could use Meetings in the Main Menu to hold a club meeting, such as Key Club, where attendees are throughout the site.
Meetings Tab Access
In a community, select the Meetings tab.

IMPORTANT: Having access to the Meetings tab is controlled within each individual community. Teachers and admins can enable this tab by toggling on Meetings in the Settings tab. This will make the Meetings tab available to all community members.

TIP: Meetings in the Meetings tab are only for members of that community. This tab will only show meetings created within the community. Setting meetings within a community is ideal for synchronous learning where you are meeting all your students at once.
Creating a Meeting
Once you have opened Meetings, click + Add New Meeting.

In Add/Edit Meeting, add a Topic, Start Time, and End Time. Optionally, you can allow attendees to automatically enter the meeting or approve them for entrance and add an agenda. Click Save when finished.
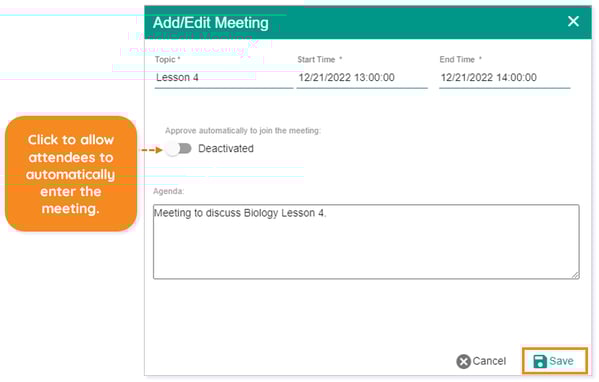
NOTE: Fields with an asterisk* denote a required field.
TIP: Include the course name in either the Topic or Agenda if your meeting is for a specific community.
IMPORTANT: When entering Start Time and End Time, you will input a date first, and all times are in military format.
You will now see your newly created meeting.
![]()
Meeting Options
When you click on the More Options icon for a meeting, you will see the following options:
Host
Click Host to start a meeting you’ve created.
NOTE: Click here to learn more about meetings and how to access them.
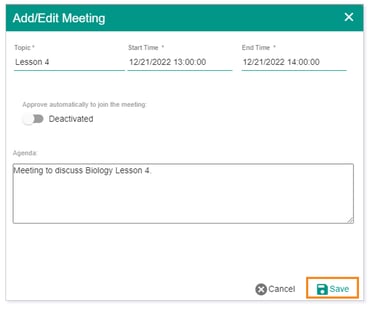
Edit
Click Edit to populate the Add/Edit Meeting pop up to edit the meeting’s details. Click Save when finished.
Manage Invitees
Click Manage Invitees to Search for users, Add users to your meeting, and Remove users from your meeting. Click X when you’re finished.
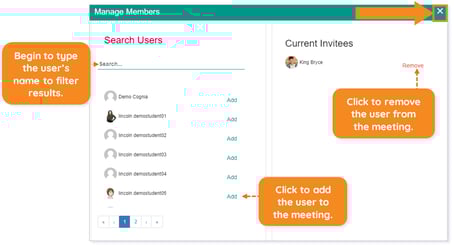
IMPORTANT: When creating a meeting within a community, you are automatically inviting all community members. Managing invitees is not an option.
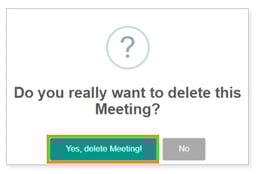
Delete
Click Delete if you’d like to delete the meeting. Select Yes, delete Meeting! if you are sure you want to continue with this action.
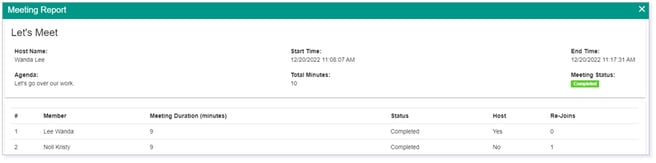
NOTE: When a meeting has a Completed status, clicking on the More Options allows you to view a Meeting Report.
Please note, the images that may be found in this resource may not match your screen.
This is a Lincoln Learning Solutions product. Access/features may vary based on client contract.
© 2023 Lincoln Learning Solutions. All rights reserved.