This article shows you how to create and insert camera images in Buzz.
TIP: Click here for additional written directions.
NOTE: To view the above resources in a new window, click here.
WHERE YOU CAN ADD CAMERA IMAGES
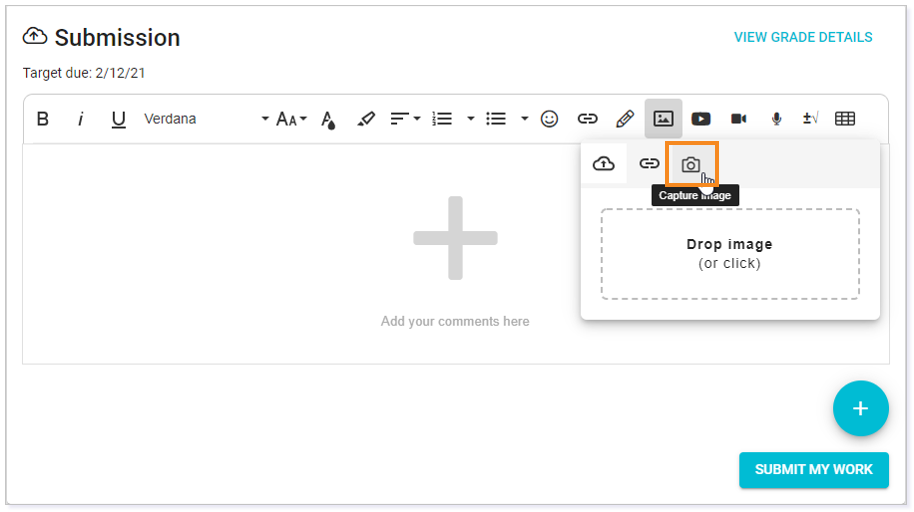
Within the Text Editor where you see the image icon, you will see the option to Capture Image.
NOTE: For students, this option is found in essay responses or within upload submission comments.
Essay Responses

Upload Comments
CREATING A CAMERA IMAGE
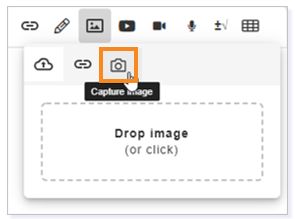
| To create a camera image, locate the insert image icon in the text editor. |  |
Once you click this icon, you will see three additional options. Locate the camera icon to capture an image using the camera on your device.
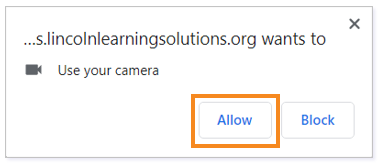
The first time you use this feature, you must Allow the camera on your device. If you do not allow, this function will not work.
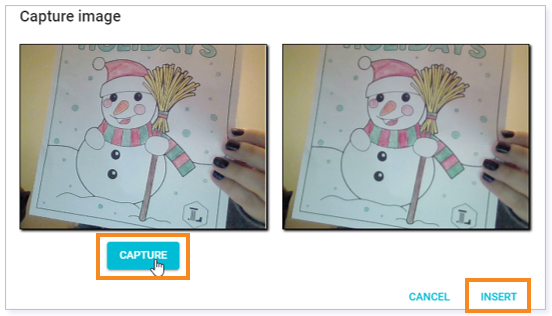
Next, create your image by holding up your document or creation and clicking the CAPTURE option.
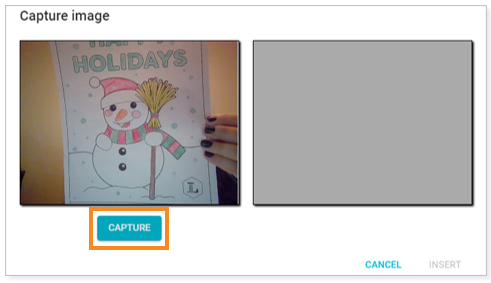
Once you click CAPTURE, you will see that load on the right view. You can CANCEL to recapture as needed. When you are ready, click INSERT to insert your camera image.
TIP: If your image is unclear, your teacher may ask you to resubmit or your grade could be lowered. Try these suggestions for capturing a clear picture.
- Make sure your fingers are not covering the picture.
- Make sure your work is close enough.
- Make sure your image is not blurry or sideways.
If your image does not follow these tips, please click CANCEL and try again.
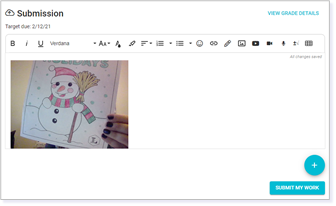
WHAT A CAMERA IMAGE LOOKS LIKE WITHIN YOUR TEXT FIELD
Essay Responses

Upload Comments
NOTE: If you need to add an additional image, please repeat the steps.
Please note, the images that may be found in this resource may not match your screen.
This is a Lincoln Learning Solutions product. Access/features may vary based on client contract.
© 2021 Lincoln Learning Solutions. All rights reserved.