This article outlines and details the different Learning Tree Text Editor options available to users.
ARTICLE QUICK LINKS
This article includes the following primary sections. Use these links to navigate directly to the section.
- Learning Tree Text Editors
- Editor Options
- Insert Hyperlink/Link
- Table Options
- Insert Image
- ChemType Options
- MathType Options
- Insert Media
- Free Hand Drawing Tool
- Graphing Tool
LEARNING TREE TEXT EDITORS
Within Learning Tree, there are many places where users can insert text via a text editor. These include an Announcement, Feedback, and Messages as well as other places. Each editor looks slightly different, but many of the buttons on each editor are the same.
Add Activity
![]()
Announcements

Edit Community and Community Information

Edit Folder
![]()
Feedback, Add/Edit Test Section, and Notes
![]()
Messages
![]()
Rubric
![]()
Assessment
NOTE: The Assessment text editor is only available to students.
![]()
Click here to return to the Article Quick Links.
EDITOR OPTIONS
Some text editors currently have limited options. Below, you can see each option available in the different editors and how it can be used. If an option is not available in all text editors, you will see NOTE within the description.
| Font |
|
This option can be selected to change the font style. NOTE: Not available in the Messages text editor. |
| Font Size |
|
This option can be selected to change the size of the font. NOTE: Not available in the Messages, Edit Folder, Edit Community, and Community Information text editors. |
| Text Color |
|
This option can be selected to change the color of the font. You can also enter a HEX color for a specific color. NOTE: Not available in the Messages text editor. |
| Background Color |
|
This option can be selected to change the background color of the font. This feature is like highlighting text. You can also enter a HEX color for a specific color. NOTE: Not available in the Messages text editor. |
| Bold |  |
This option can be selected to bold the text. |
| Italic |  |
This option can be selected to italicize the text. NOTE: Not available in the Edit Folder text editor. |
| Underline |  |
This option can be selected to underline the text. |
| Strikethrough |
This option can be selected to strike through the text. NOTE: Only available in Rubric, Announcements, and Add Activity text editors. |
|
| Align Left |  |
This option can be selected to align text to the left. NOTE: Not available in the Assessment text editor. |
| Center |
This option can be selected to center the line of text. NOTE: Not available in the Assessment text editor. |
|
| Align Right |
This option can be selected to align text to the right. NOTE: Not available in the Assessment text editor. |
|
| Justify |
This option can be selected to give the text a straight edge on both the left and right sides. NOTE: Not available in the Assessment and Messages text editors. |
|
| Bulleted List | This option can be selected to create a bulleted list in your text. | |
| Numbered List | This option can be selected to create a numbered list in your text. | |
| Indent |
This option can be selected to indent a line of text. TIP: Continue to press the button to indent the line multiple times. |
|
| Outdent |
This option can be selected to reduce the indent for a line of text. TIP: Continue to press the button to reduce the line indent multiple times. |
|
| Subscript |  |
This option can be selected to place a subscript in the text. Pressing the button again will remove the subscript and apply the chosen font. NOTE: Only available in Rubric, Announcements, Assessment, and Add Activity text editors. |
| Superscript |  |
This option can be selected to place a superscript in the text. Pressing the button again will remove the superscript and apply the chosen font. NOTE: Only available in Rubric, Announcements, Assessment, and Add Activity text editors. |
| View HTML |  |
This option can be selected to display the HTML code view of the text. It also allows you to work in the code view. NOTE: Not available in the Messages text editor. |
| Format |
|
Selecting from the drop-down menu will allow you to choose a preset paragraph format for the selected text or line. NOTE: Only available in Messages, Announcements, and Add Activity text editors. |
| Insert Hyperlink/Link |
This option allows you to link to a website. To learn more about how to use the hyperlink/link option, review the Insert Hyperlink/Link section of this article. |
|
| Create Table |  |
Use this option to create, edit, and format tables. To learn more about Table features, visit the Table Options section of this article. |
| Insert image |  |
Use this option to insert images. To learn more about how to insert images, review the Insert Image section of this article. |
| Insert Video |  |
Use this option to insert a video URL. NOTE: Not available in the Messages, Announcements, Rubric, and Assessment text editors. |
| Insert File |  |
Use this option to insert files from your computer or a web address. NOTE: Only available in Rubric, Announcements, Assessment, and Add Activity text editors. |
| Maximize |  |
Use this option to maximize the text box. NOTE: Only available in Add Activity text editor. |
| Minimize |  |
Use this option to minimize the text box. NOTE: Only available in Add Activity text editor. |
| ChemType |  |
Use this option to create chemistry equations. TIP: Use the handwritten mode feature to write out the equation. To learn more about how to insert equations, review the ChemType section of this article. NOTE: Only available in Add Activity, Rubric, and Assessment text editors. |
| MathType |  |
Use this option to create mathematical equations. TIP: Use the handwritten mode feature to write out the equation. To learn more about how to insert equations, review the MathType section of this article. NOTE: Only available in Add Activity, Rubric, and Assessment text editor. |
| Media |  |
Use this option to upload a media file, record a video or audio file, and embed a video, presentation, and more. To learn more about how to insert media, review the Insert Media section of this article. NOTE: Only available in Add Activity, Announcements, and Rubric text editors. |
| Remove Font Style |  |
Select text and choose this option to remove any applied font style. NOTE: Only available in Edit Community, Community Information, and Edit Folder text editors. |
| Free Hand Drawing |  |
This option allows you to draw an image in the text editor. To learn more about how to use the Free Hand Drawing feature, review the Free Hand Drawing Tool section of this article. NOTE: Only available in Assessment text editor. |
| Graphing Tool |  |
Use this option to draw graphs in the text editor. To learn more about how to graph, review the Graphing Tool section of this article. NOTE: Only Available in Assessment text editor. |
| Help |  |
Use this option to see a list of command shortcuts. NOTE: Only Available in Edit Community, Community Information, Edit Folder, Feedback, Add/Edit Test Section, and Notes text editors. |


Click here to return to the Article Quick Links.
INSERT HYPERLINK/LINK
NOTE: The Insert hyperlink/Link icon is found in the Edit Community, Community Information, Edit Folder, Feedback, Add/Edit Test Section, and Notes text editors.
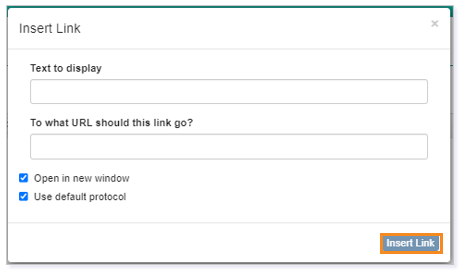
Link
Begin by clicking the Link icon.

Type the Text to display and then insert the link To what URL should this link go? This will link the typed text to the URL. Optionally, check the box to have the linked URL open in a new window when clicked. Click Insert Link when finished.
IMPORTANT: Leave the Use default protocol box checked.
Insert Hyperlink
NOTE: The Insert Hyperlink icon is found in the Add Activity, Announcements, Messages, Rubric, and Assessment text editors.
Click the Insert Hyperlink icon.

Type the web address and the display text to which you want to link the address. Optionally, you can check the box to have the link open in a new window. Click Insert when finished.
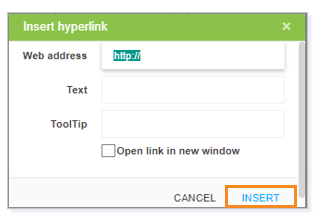
TIP: Type in ToolTip to display a brief text description of the hyperlink when the user hovers over it. This Tooltip text can help provide additional context and information about the hyperlink, making it easier for users to understand where the link will take them before they click on it.
TABLE OPTIONS
Inserting a Table
Start by selecting the Table icon.

You will have the option to create a table up to 10 by 10 in size.
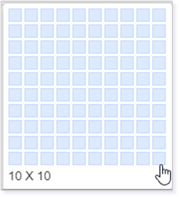
Choose the table’s size and it will appear in the editor.
Once a table is inserted into the text editor, you can click in the cells to type and add your information to the table.

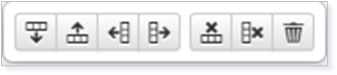
Adjusting Table Formatting
Once you have created the table, click anywhere inside the table for table formatting.
A pop-up menu will appear. You will have the option to:
- Add row below
- Add row above
- Add column left
- Add column right
- Delete row
- Delete column
- Delete row
TIP: Use the text editor to format the table’s font, font size, font color, and more.
Click here to return to the Article Quick Links.
INSERT IMAGE
Inserting an Image
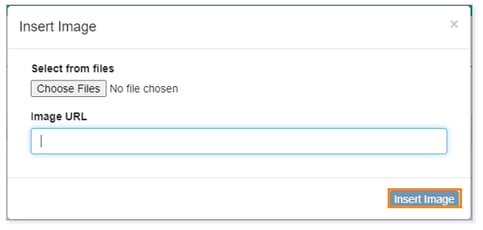
Clicking the icon will open an Insert Image pop-up window.

Choose an image file or insert an Image URL. If inserting a URL, click Insert Image when finished.
Editing an Inserted Image
Once the image has been inserted, you can click on the image to Resize to full, half, quarter, or Original size, float the image left or right, Remove float, or Remove image.

Click here to return to the Article Quick Links.
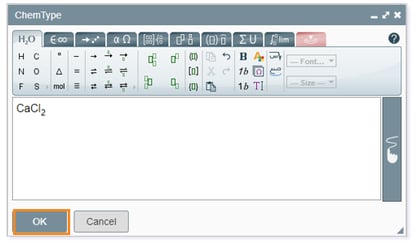
CHEMTYPE OPTIONS
Clicking the ChemType icon will open the ChemType pop-up menu to allow you to create chemistry formulas and equations by typing and using the icons. Click OK to insert your formula or equation into the text box.
Commonly Used Symbols
 |
Forward reaction: Reactants on the left of the arrow produce products on the right side of the arrow. |
 |
Left subscript and superscript: Use this to add atomic masses and atomic numbers into formulas and nuclear equations. |
 |
Increment: Use this to show that energy in the form of heat is added. |
 |
Superscript: Use this to show oxidation numbers, charges, or ions. |
 |
Equilibrium: Use this this to show the rates of reaction are the same. |
TIP: Choose a different tab in the ChemType pop-up to see all available ChemType options.
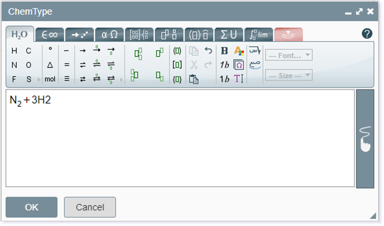
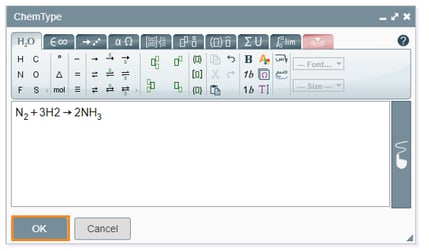
Forward Reaction
Begin by typing the reactants in the ChemType editor.
Next, select the Forward reaction icon.
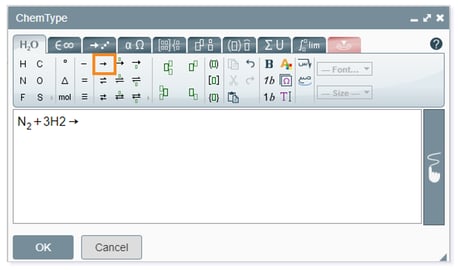
Finally, add the products to the right of the arrow and click OK to add the formula into your text box.
Click here to return to Commonly Used Symbols.
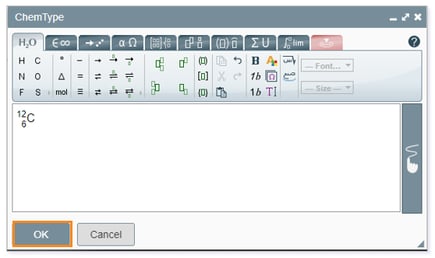
Left Subscript and Superscript
Select the Left subscript and superscript icon.

Type the superscript, subscript, and chemical symbol, and then click OK to add the isotope into your text box.
Click here to return to Commonly Used Symbols.
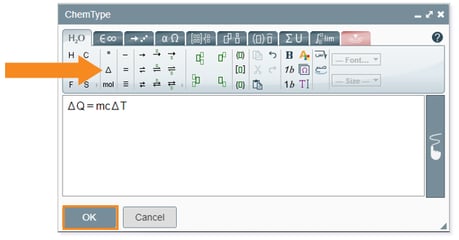
Increment
Begin by selecting the Increment icon, or type your formula, and add the Increment icon when needed. Click OK to add the formula into your text box.
Click here to return to Commonly Used Symbols.
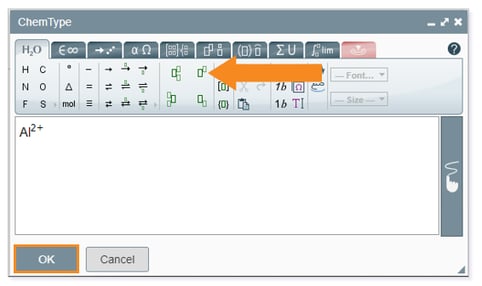
Superscript
Begin by typing the chemical element.
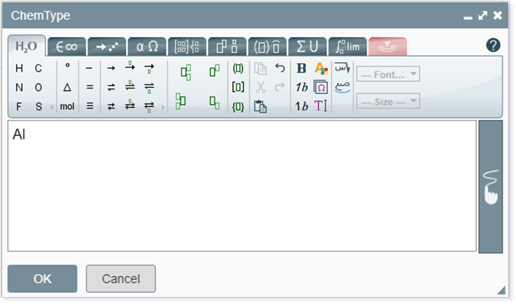
Select the Superscript icon and type the superscript. Click OK to add the ion into your text box.
Click here to return to Commonly Used Symbols.
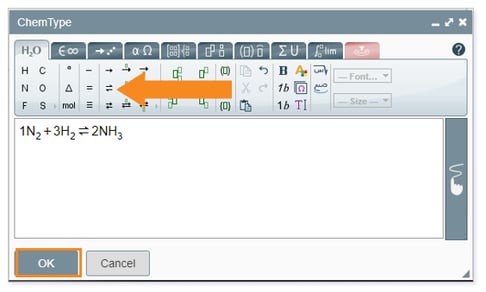
Equilibrium
Begin by typing reactants, and then select the Equilibrium icon. Finally, type the products. Click OK to add the formula into your text box.
TIP: Use handwritten mode to use your mouse to free-hand drawing of the formula or equation.
![]()
Click here to return to Commonly Used Symbols.
Click here to return to the Article Quick Links.
MATHTYPE OPTIONS
Clicking the MathType icon will open the MathType pop-up menu to allow you to create mathematical equations by typing and using the icons. Click OK to insert the equation into the text box.
Commonly Used Symbols
 |
Superscript: The base of an exponential expression is the larger number that is getting the exponent. This is represented by the dark green box in the icon. The exponent, or power, is the small number that is raised up and to the right of the base. This is represented by the lighter green box in the icon. |
 |
Subscript: A type of lettering form where one letter is written lower than the letters around it. The subscript is represented by the lighter green box in the icon. |
 |
Square Root: The square root of a number is a value that, when multiplied by itself, gives the number. |
 |
Root: Root or radical expression is an expression containing a square root or an nth root. The nth root is represented by the light green box in the icon. |
 |
Degree: A degree is a measure of temperature or the measure of an angle. |
| Fraction: A fraction is part of a whole number. The top number (the numerator) represents how many parts exist. The bottom number (the denominator) represents the number of parts into which the whole is divided. |
TIP: Choose a different tab in the MathType pop-up to see all MathType options.
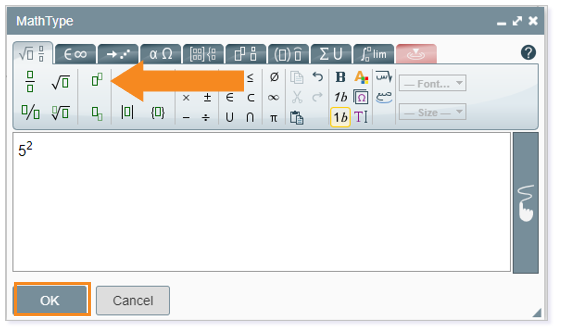
Superscript
The base of an exponential expression is the larger number that is getting the exponent. The exponent, or power, is the small number raised up and to the right of the base.
Start by typing the whole number into the MathType Editor, then select the Superscript icon, and add the exponent. Finally, click OK to add your expression into your text box.
Click here to return to Commonly Used Symbols.
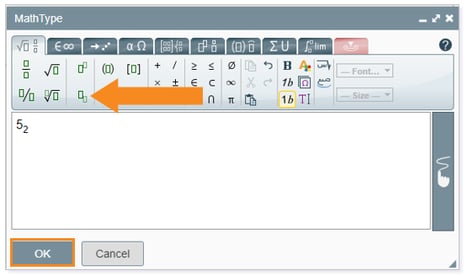
Subscript
A subscript is a lettering form where one character is written lower than the characters around it.
Start by typing the whole number, then select the Subscript icon, and add the subscript number. Finally, click OK to add your expression into your text box.
Click here to return to Commonly Used Symbols.
Square Root
The square root of a number is a value that, when multiplied by itself, gives the number inside the symbol.
Begin by selecting the Square root icon, and then type the number of which you are seeking the square root. Click OK to add your expression into your text box.

Click here to return to Commonly Used Symbols.
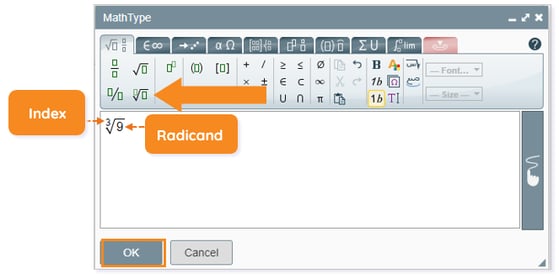
Root
A root or radical expression is an expression containing a square root or an nth root.
Begin by selecting the Root icon, and then fill in the index and radicand with the appropriate numbers. Click OK to add your expression into your text box.
Click here to return to Commonly Used Symbols.
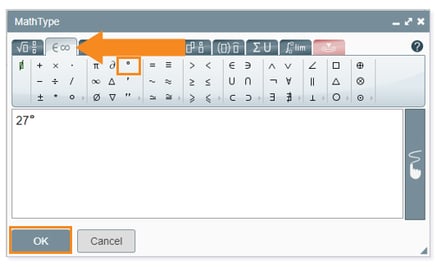
Degree
A degree is a measure of temperature or the measure of an angle.
In the MathType editor, select the Symbols tab. Type the whole number, and then click the Degree sign. Click OK to add your expression into your text box.
Click here to return to Commonly Used Symbols.
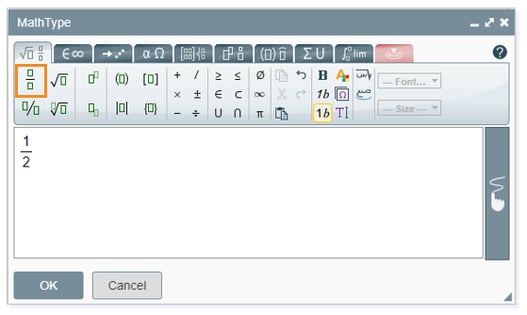
Fraction
A fraction is part of a whole number. The top number (the numerator) represents how many parts exist. The bottom number (the denominator) represents the number of parts into which the whole is divided.
Click the Fraction icon to begin. Enter the numerator before clicking and typing the denominator. Click OK to add your expression into your text box.
TIP: Use handwritten mode to use your mouse for free-hand drawing of the formula or equation.
![]()
Click here to return to Commonly Used Symbols.
Click here to return to the Article Quick Links.
INSERT MEDIA
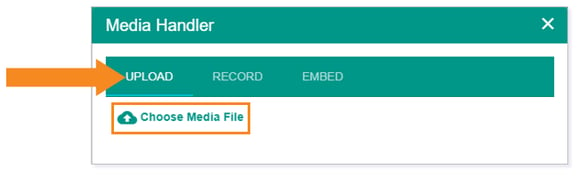
Clicking the Media icon will allow you to insert a video by either uploading a media file, recording video or audio, or using an embed code within the Media Handler pop-up modal.

Upload
In the UPLOAD tab, you can Choose Media File to select an mp4 to upload.
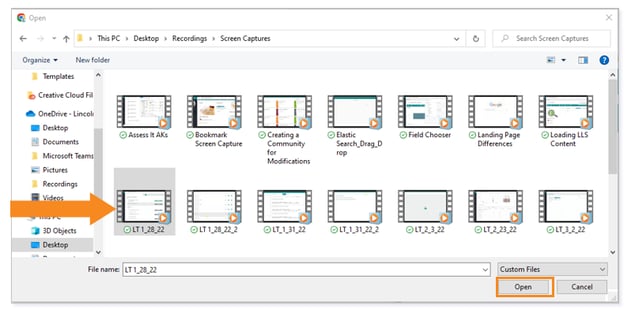
Select your mp4 file and click Open.
Once the file is uploaded in the Media Handler, click OK to add it to the text box.
Record
In the Record tab, you can choose to record and insert video or audio into the text box.
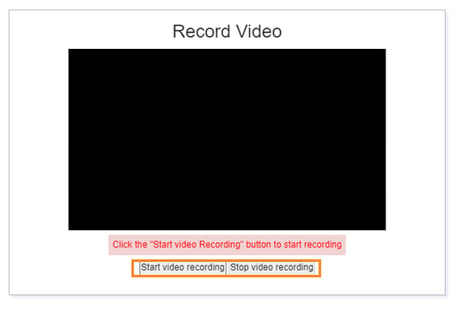
Recording a Video
In the Record tab, select Video from the Choose an option drop-down menu.

When you’re ready to record, click Start video recording, and then click Stop video recording when finished.
You can now upload your recording to Learning Tree or download it to your device. After uploading your recording, click OK to insert the recording into the text box.

Recording Audio
In the Record tab, select Audio from the Choose an option drop-down menu.
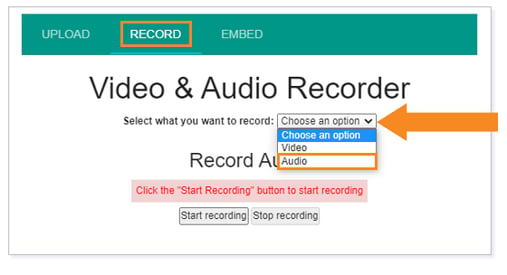
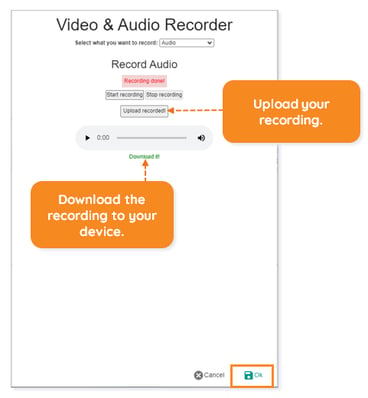
When you’re ready to record, click Start recording, and then click Stop recording when finished.

You can now upload your recording to Learning Tree or download it to your device. After uploading your recording, click OK to insert the recording into the text box.
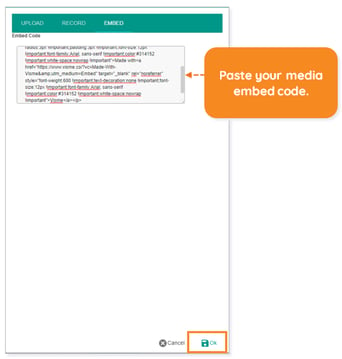
Embed
In the Embed tab, paste your media embed code and click OK to insert the media into the text box.
Click here to return to the Article Quick Links.
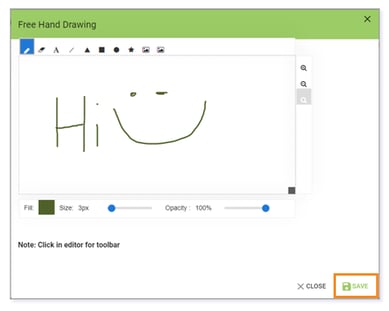
FREE HAND DRAWING TOOL
Students can use the Free Hand Drawing tool in any Assessment text editor.
Click the Free Hand Drawing icon to open the tool.

NOTE: Click in the text box to open the editor.
You can draw in the editor and edit your drawing using several options like changing the font color, erasing, and inserting text, shapes, and images. Click SAVE when finished.
Click here to return to the Article Quick Links.
GRAPHING TOOL
Students can use the graphing tool in any Assessment text editor to plot points, graph equations, and insert functions.
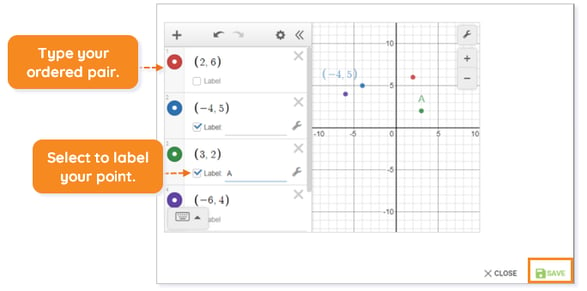
Plot Points
Begin by typing in your ordered pair as (x, y). Click SAVE to add your graph to the text box.
TIP: Select the Label checkbox to label your point on the graph.
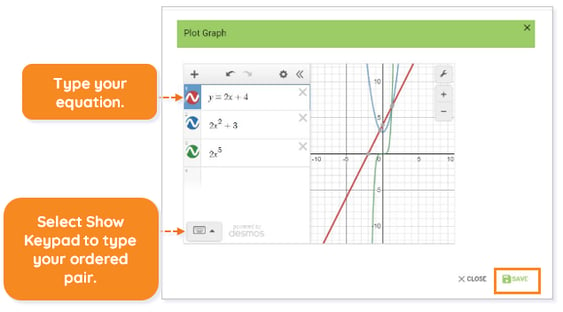
Graph Equations
Begin typing your equation or select Show Keypad for better functionality. Click SAVE to add your graph to the text box.
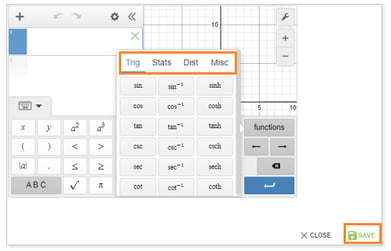
Insert Functions
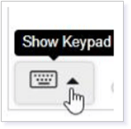
Begin by selecting Show Keypad.
Then, select functions.
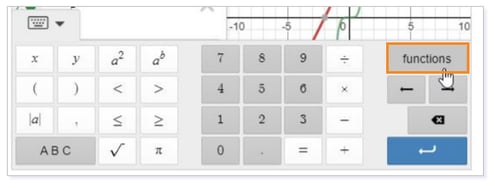
Build a function using the preset options found under each tab: Trig, Stats, Dist, Misc. When finished, click SAVE to add your graph to the text box.
Click here to return to the Article Quick Links.
Please note, the images that may be found in this resource may not match your screen.
This is a Lincoln Learning Solutions product. Access/features may vary based on client contract.
© 2023 Lincoln Learning Solutions. All rights reserved.