
The ability to manage user information in Pulse can be dependent on your user role. Depending on your permissions, you may be able to edit:
To edit either the email address or phone number, you will need to navigate to the user record first.
In Users, search for the user whose information you wish to manage.

Click the Full Name hyperlink to open the user record.

The user’s information record displays.
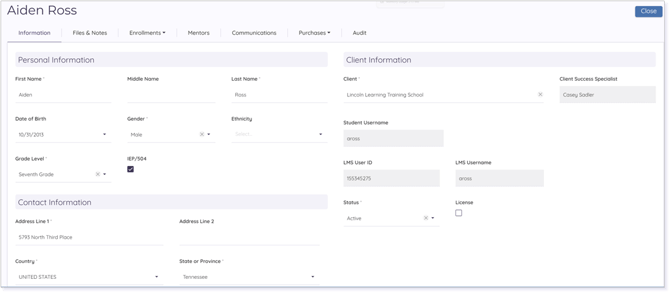
Scroll down to Contact Information (underneath Personal Information).
Managing an Email Address
Locate Email Addresses in the Contact Information.
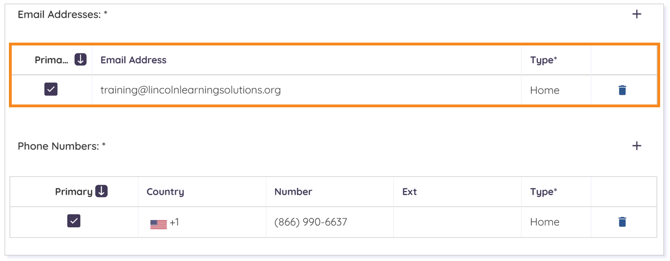
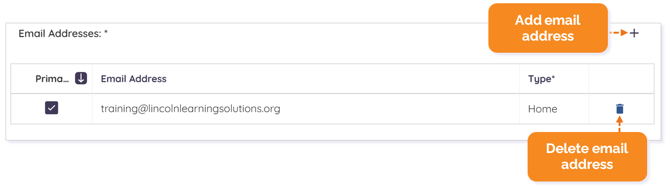
To add an email address, click the +. To delete an email address, click the trashcan icon.
NOTE: The email address entered first on the user record is marked Primary. To change the primary email address associated with the user, click the checkbox next to the appropriate address.
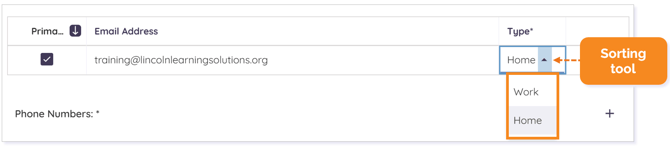
To change the Type, click the field to the right of the email address. Then, choose the appropriate type from the drop-down menu.
NOTE: Clicking the Type column title activates the sorting tool. Click the arrow to sort in ascending order (A to Z) or descending order (Z to A).
Click here to return to the top of the article.
Managing a Phone Number
Locate Phone Numbers in the Contact Information.

To add a phone number, click the +. To delete a phone number, click the trashcan icon.
NOTE: The phone number entered first on the user record is marked Primary. To change the primary phone number associated with the user, click the checkbox next to the appropriate number.
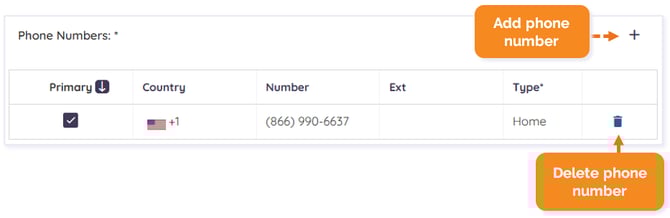
To change the Type, click the field to the right of the phone number. Then, choose the appropriate type from the drop-down menu.

NOTE: Clicking the Type column title activates the sorting tool. Click the arrow to sort in ascending order (A to Z) or descending order (Z to A).

Click here to return to the top of the article.
Managing Communication Configurations
Within Pulse, you can manage the types of auto-generated communications at the User level.
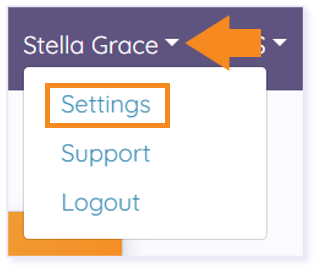
Click your name in the upper right-hand corner and select Settings from the drop-down menu.
The User Settings window will populate. The default is set to the client’s communication configurations. Uncheck any setting for which you do not want to receive notifications.
WARNING: Once a user customizes their communications settings, any further changes requested at the client communication configuration level will not be applied to those customizations.
NOTE: Clicking Reset will restore the User Settings to the Client configurations settings.
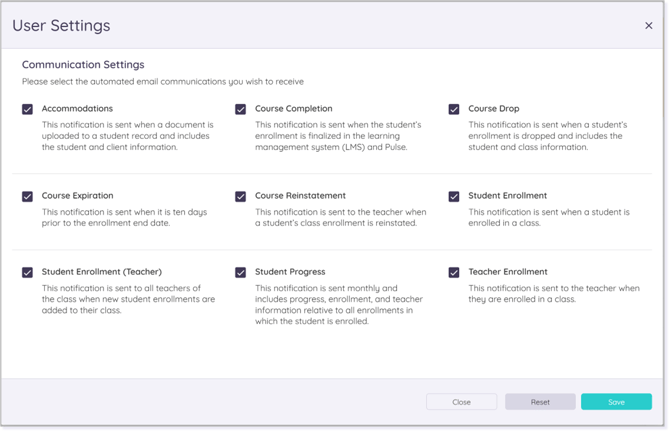
NOTE: If the Client Communication Configuration is set to not send the Student Progress notifications, the user will not be able to enable this specific communication.
Click Save.

Click here to return to the top of the article.
Please note the images found in this resource may not match your screen. Access and/or features may vary based on client contract.
© 2025 Lincoln Learning Solutions. All rights reserved.