This article details how to send email through Buzz. Emails can be customized for individual students, all students within a course, and observers.
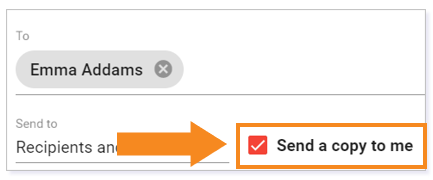
IMPORTANT: All emails are sent outside of Buzz, so there is no record of them kept in the system unless you choose the option to send a copy to yourself.
Click the links below to navigate directly to that section.
- Sending Email Through the Communication Page
- Sending Email from People
- Send a Copy to Me
- Creating Your Message
SENDING EMAIL THROUGH THE COMMUNICATION PAGE
Start by expanding the Main Menu.

You can send mail by selecting Communication from the Main Menu.
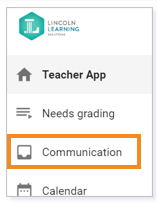
Next, click the send mail icon in the Communication toolbar.

To
The To field allows you to personalize an email to a student, all students within a course, or all students within a set of courses.
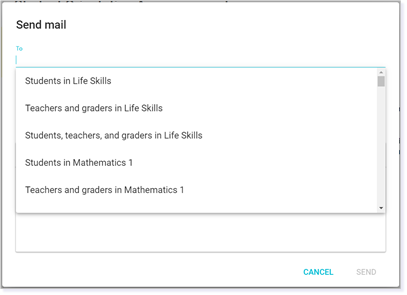
TIP: Type a student’s name or course name into the To field. You may also click in the To field and use the drop-down menu to select a course or names of students. If you need to remove a student from the list, select the X next to the name.
Send To
The Send To field allows you to specify who is receiving the email. You can send an email out of the system to specified recipients and/or their observers. An observer might be a parent or someone coaching and supporting the student throughout the course.
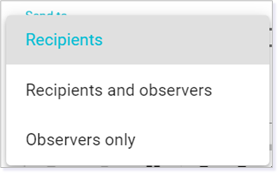
Recipient
There are a number of combinations that can be chosen when sending an email from Buzz. The information below will help to clarify who will receive the email based on the choices that are made.
NOTE: Observers refers to parent(s)/guardian(s) or mentor(s)/coach(es) associated to a student.
Send Mail to Teachers and Graders in a Course
|
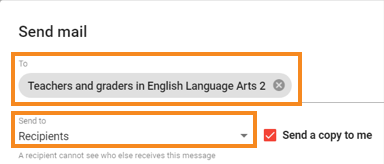
To: Teachers and graders in course Send to: Recipients This email will send to just teacher emails of that specific course. |
 |
|
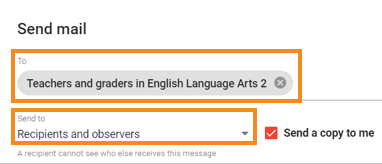
To: Teachers and graders in course Send to: Recipients and observers This email will send to teacher emails and observer emails of that specific course. |
 |
|
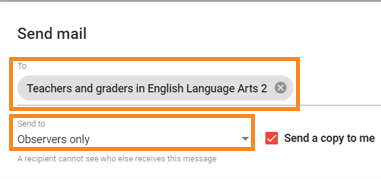
To: Teachers and graders in course Send to: Observers only This email will send to just observer emails for that specific course. |
 |
Send Mail to Students in a Course
|
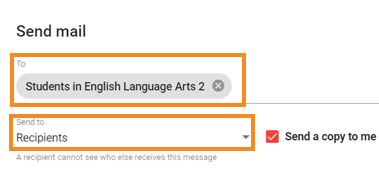
To: Students in course Send to: Recipients This email will send to just student emails of that specific course. |
 |
|
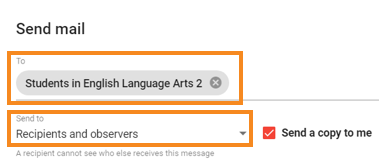
To: Students in course Send to: Recipients and observers This email will send to student emails and observer emails of that specific course. |
 |
|
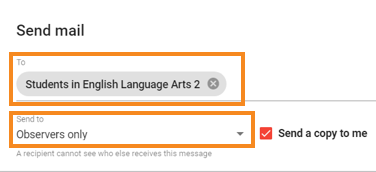
To: Students in course Send to: Observers only This email will send to just observer emails for that specific course. |
 |
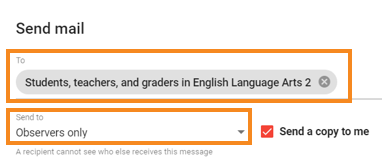
Send Mail to Students, Teachers, and Graders in a Course
|
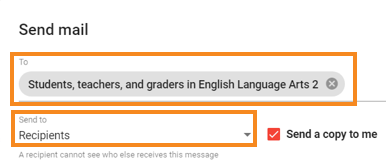
To: Students, teachers, and graders in course Send to: Recipients This email will send to students' and teachers' emails of that specific course. |
 |
|
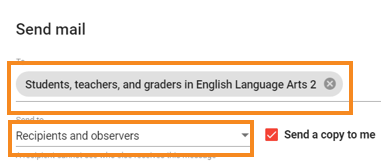
To: Students, teachers, and graders in course Send to: Recipients and observers This email will send to students' and teachers' and observers' emails of that specific course. |
 |
|
To: Students, teachers, and graders in course Send to: Observers only This email will send to just observer emails for that specific course. |
 |
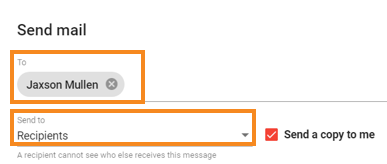
Send Mail to Individual Student
|
To: (type in a student’s name) Send to: Recipients This email will send to just that student’s email. |
 |
|
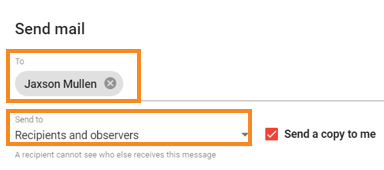
To: (type in a student’s name) Send to: Recipients and Observers This email will send to the student’s email and observer emails for that specific student. |
 |
|
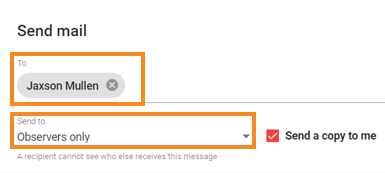
To: (type in a student’s name) Send to: Observers onlyThis email will send to just observer emails for that specific student. |
 |
Click here to return to the top of the article.
SENDING EMAIL FROM PEOPLE
NOTE: Sending email from People is only for communication to students, not observers.
In the People area, you can display a list of students for a single course or for all courses.
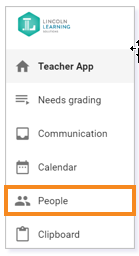
To access People from the Home page, open the Main Menu and select People. This displays the students enrolled in all courses.
To send email to one student or all the students in a specific course, click the People icon on the Course Card or in the List View. This displays all the students in that course.

TIP: These same options will be available in the Main Menu from other areas of the course.
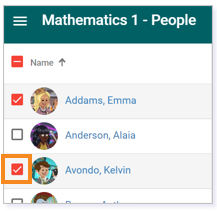
From the People page, select individual email recipients by clicking the box to the left of the student’s name. Select all students by clicking the box next to Name.
Next, click the mail icon and a message screen will appear.

Click here to return to the top of the article.
SEND A COPY TO ME
WARNING: If you are sending a message through the Send mail function, no record of the email will exist unless the Send a copy to me box is selected.
Click here to return to the top of the article.
CREATING YOUR MESSAGE
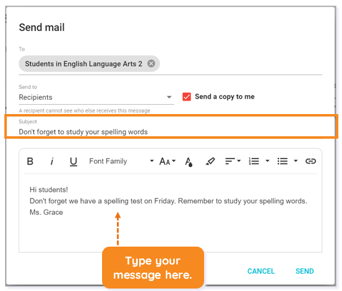
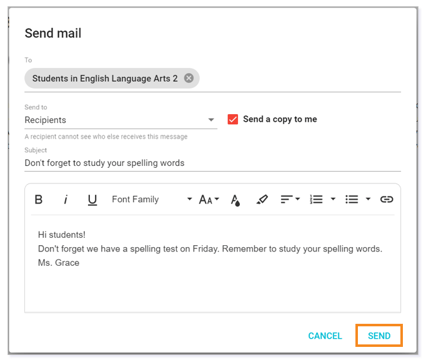
Type the title of your email in the Subject box and enter your message in the body.
Formatting the Text
You can change your font and the layout of your email message through the Text Editor. Hover over each symbol to learn more about the function.

The Text Editor allows you to make the following format changes:
- Bold, italicize, or underline the text
- Change the font type
- Change the size of the font
- Change the color of the font or the color of the font highlight
- Right align, center align, left align, or justify the text
- Create a numbered or bulleted list
- Insert or remove a hyperlink
TIP: For more information on these text editor functions, see the Buzz Text Editor Options article.
Adding and Removing Hyperlinks
You can add a hyperlink to an email by clicking the hyperlink icon.

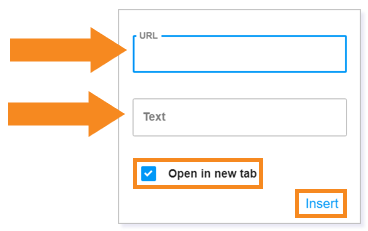
The following points address the items in the popup hyperlink menu:
- URL: Add the URL for the website to this field.
- Text: Describe how you want the website to appear in the email. For example, if you want the actual URL to show in your email, copy it into the display Text. However, if you want your email to show the text “Lincoln Learning Solutions,” for example, as hyperlinked words, type “Lincoln Learning Solutions” in the display Text field.
- Check Open in new tab if you would like the webpage to open in a new window rather than have the student navigate away from the email.
- Click Insert to add the hyperlink to the email.
Once your hyperlink is created, you can click on it again to preview it in another window (box with an arrow), edit it (the pencil), or undo the hyperlink (link with a slash).

Sending the Message
Once you are done composing your message, simply click Send, and the communication box will disappear once your email has been sent successfully.
Click here to return to the top of the article.
Please note, the images that may be found in this resource may not match your screen.
This is a Lincoln Learning Solutions product. Access/features may vary based on client contract.
© 2022 Lincoln Learning Solutions. All rights reserved.

