This article explains how students can apply blackout dates to a calendar view in Buzz.
TIP: Click here for additional written directions.
NOTE: To view the above resource in a new window, click here.
Students can add blackout dates to their Buzz calendar. When blackout dates are added, Buzz will adjust auto-generated due dates. Due dates that are set by a teacher will remain the same.
IMPORTANT: Adjusting your calendar to reflect your own personal blackout dates does not excuse you from completing work. You are assuming the responsibility of the adjusted pacing.
ADDING BLACKOUT DATES TO THE BUZZ CALENDAR
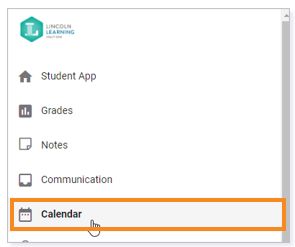
Begin by selecting the Calendar option from the Main Menu.
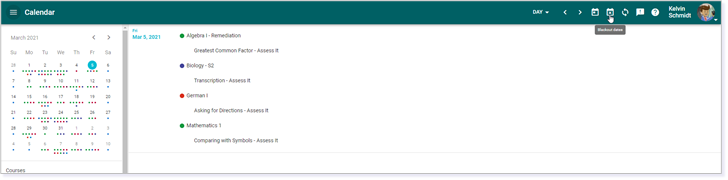
This opens your Buzz Calendar containing the projected due dates of assessments for each course.
Next, click the Blackout dates icon.
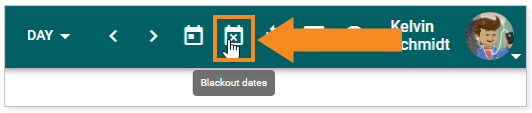
This opens a pop-up screen where you can add additional blackout dates specific to you. You will also see Other blackout dates previously applied to your calendar.
Creating a Blackout Date
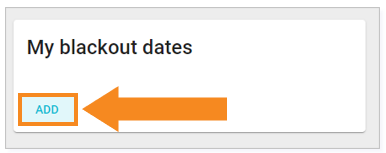
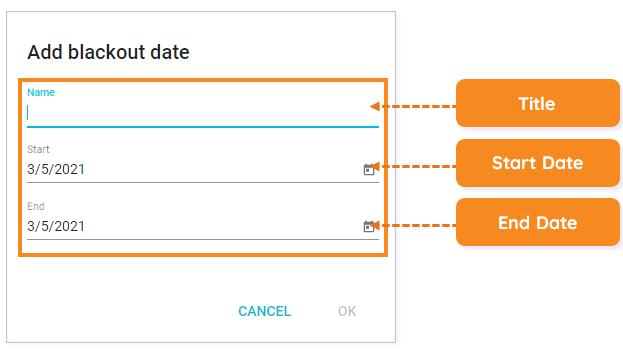
In the pop-up, click the ADD button under My blackout dates.
Next, title your date by adding a Name. Then, select the start and end date of your blackout date.
IMPORTANT: This must be a future date and can range across multiple dates if applicable.
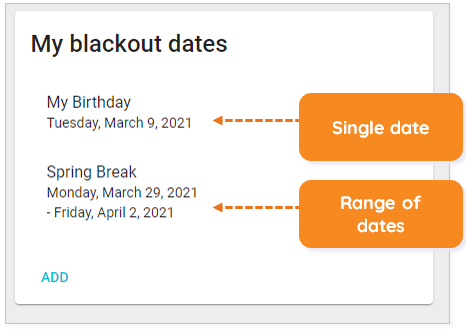
Once you are ready, click OK. Your added dates will now show under My blackout dates. Click ADD again to add more options.
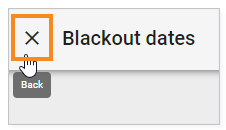
To return to your Buzz Calendar, click the X in the upper left corner.
CALENDAR COMPARISON
You will now see black dots under the scheduled blackout dates.

Please note, the images that may be found in this resource may not match your screen.
This is a Lincoln Learning Solutions product. Access/features may vary based on client contract.
© 2021 Lincoln Learning Solutions. All rights reserved.