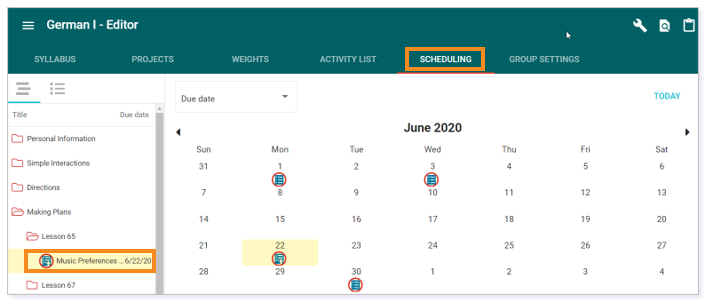
This article is designed to help you to set up due dates for any non-gradable and gradable activities in Buzz.
IMPORTANT: You can only set due dates for courses that are set as Traditional/Ranged. If you need to adjust this, please reach out to Support Services. Typically, courses are set up as Continuous, which automatically adjusts the due dates based on the start and end date of an enrollment.
ASSIGNING A DUE DATE
Assigning from SYLLABUS
Click the SYLLABUS tab. Select the activity for which you will be setting a due date. Then, click the Edit icon.
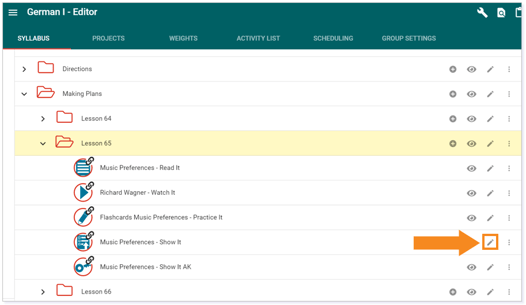
Next, click the SETTINGS tab. In the Activity settings tile, check the box next to Due date. Once you check the box to allow a due date, you can then specify what you would like the due date to be.

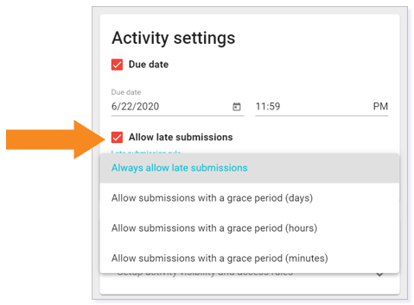
If you choose to allow for late submissions, check the Allow late submissions box. Then, select the length of the grace period (i.e., days, hours, minutes) that allows for the students to submit their assignment after the assigned due date.
TIP: If you would like to learn more about making an activity gradable, watch Adjusting Visibility and Gradebook Settings: Video.
Finally, remember to click SAVE to apply the new due date settings.

TIP: Once you save your due date settings, that assignment will appear on the calendar within the Editor. Click on the SCHEDULING tab to view the calendar.
Assigning from SCHEDULING
NOTE: You can also navigate to the Editor from the Main Menu.
Locate the SCHEDULING tab.
In the left menu, you will see that all Graded Activities are listed. You can drag and drop any activity to the date on which you would like it to be due.
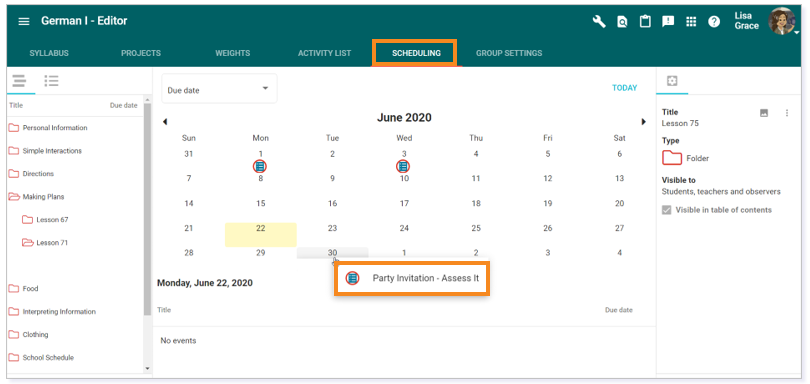
TIP: Those items that are already determined to be gradable are automatically loaded on the left. If you want to assign due dates to any other items, edit them in the Syllabus and check the box Due date under the Activity settings tab. This will populate the item on the left pane, making dragging and dropping a breeze. Items do not need to be part of the gradebook to be part of the schedule; they simply need a due date.
CHANGING A DUE DATE
You can change the due date from the SYLLABUS or from SCHEDULING.
Changing from SYLLABUS
Follow the steps described previously to make changes to the due date from the SYLLABUS.

Changing from SCHEDULING
More Options
To edit the due date under SCHEDULING, click on the due date in the calendar. Then, click on the More Options icon next to the due date.
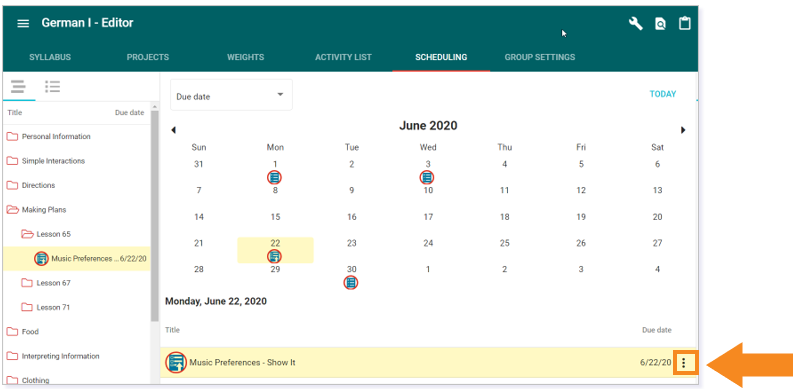
Doing so populates a menu of options.
You can Edit the activity, Preview the activity, Remove Due Date, or Delete the activity.
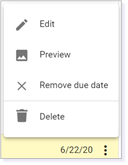
Click Edit. Then, follow the prior steps to change the due date.

IMPORTANT: If you need to make adjustments to the late submission expectations, the Edit option will allow for these specifics
Drag and Drop
Under SCHEDULING, drag and drop any visible activity to the day you would like it to be due.
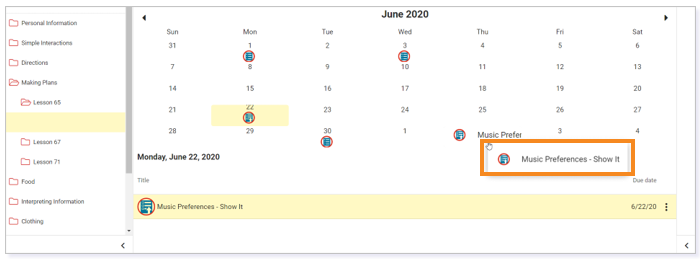
TIP: This method will only change the day the activity is due. To change other settings, go to the SETTINGS tab of the activity.
Please note, the images that may be found in this resource may not match your screen.
This is a Lincoln Learning Solutions product. Access/features may vary based on client contract.
© 2021 Lincoln Learning Solutions. All rights reserved.

