This article details the Course settings options available in the Editor.
COURSE SETTINGS
Modifications can be made to many features of the course within Course settings. The Course settings option can be found in the Editor.
From the Home page, click the Editor icon in either view.
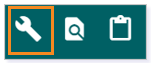
TIP: You can also access the Editor using the Main Menu, by selecting the course, and clicking Editor for the course. To change the Course settings, click the Tools icon in the Editor Toolbar.
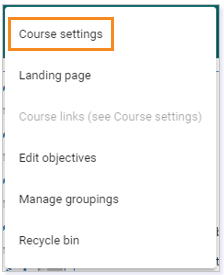
Select Course settings.
IMPORTANT: Remember to click SAVE in the upper right corner of your screen once all modifications are completed.

General Course Information
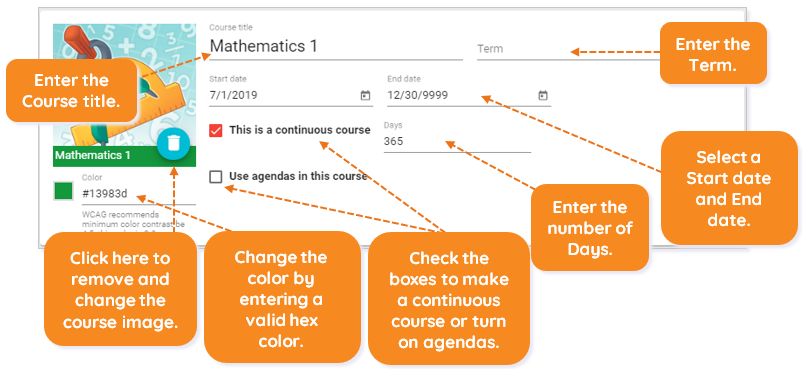
General settings of the course can be modified, including the Course thumbnail, Color, Course title, Term, Start date, End date, and number of Days.
WARNING: If you are using the Pulse system, please click here to review the Changing a Class Type from Continuous to Ranged/Traditional article for appropriate steps. You will see this option in the General Course Information, but it is not recommended to uncheck this box.
GRADEBOOK OPTIONS
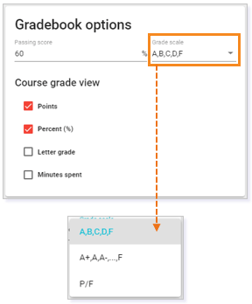
In Gradebook options, enter a number for the Passing score for the course and use the drop-down menu to select a Grade scale.
Choose the Course grade view by clicking the box(es) next to Points, Percent (%), Letter grade, and Minutes spent.
Grading Categories
Click the box next to Use weighted categories to add details for the Grading categories.
Click Include or Exclude to edit those details.
Click ADD GRADING CATEGORY to add a new grading category.

A box will appear to edit the Grading category details.
The Name will show Category 3. This name can be changed to appropriately title the new grading category.
Use the drop-down menu for Drop lowest score to select the number of low assignments to drop. Click the All activities are extra credit box to designate all activities to be extra credit. You can also choose an option for how the score will display to students.
You may also click the REMOVE THIS GRADING CATEGORY option if you wish to remove the category.
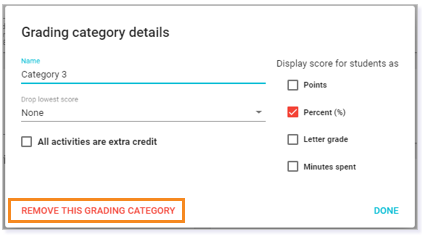
Click DONE when finished.
The new Grading category appears on the Course settings page.
Grade Scales
In Grade scales, assign letter grades to the scores students earn in the course. Set scores that include a letter grade, letter grades with plus and minus scores, or percentages for pass/fail.
The option exists to add another grade scale by clicking ADD GRADE SCALE.

Click the options to edit the scale.
You can edit the Grade scale details for the course.
Update the number by clicking on the line labeled Percent (%) and typing a number or by using the up and down arrows to enter a new number.
To remove a letter grade and score, click the trashcan icon.
To add a new bracket, click on ADD BRACKET.
To delete the entire Grade scale, click REMOVE THIS GRADE SCALE.

Click DONE when finished.
Advanced Options
There are several features in Advanced options. Simply click the box(es) next to each option to enable it in the course.
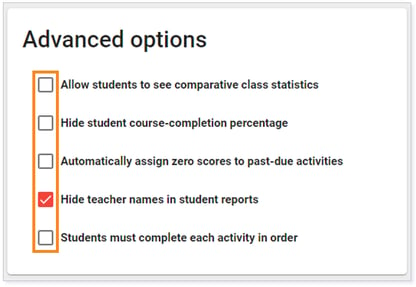
To learn more about the Automatically assign zero scores to past-due activities option, please refer to the Zeroing Out Past-Due Assessments article.
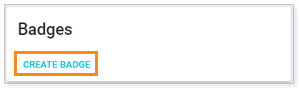
BADGES
To create Badges in the course, click on CREATE BADGE.
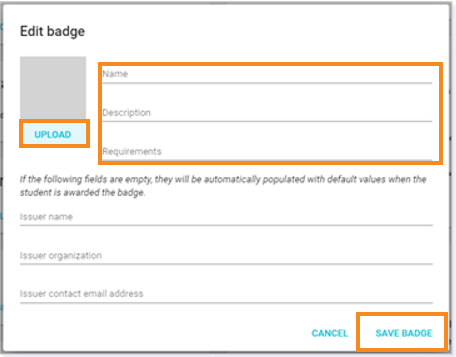
Click UPLOAD to add an image.
Enter the Name, Description, and Requirements for the Badge.
Optionally, enter the Issuer’s name, organization, and contact email address.
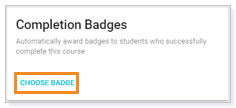
Completion Badges
Badges can be automatically assigned to students in Completion Badges. These badges are awarded to students automatically when they complete the course. To choose a badge to auto-assign, click CHOOSE BADGE.
Click the box to select a badge to automatically assign to students upon completion of the course.
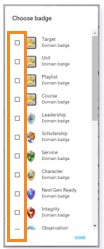
When finished, click DONE.
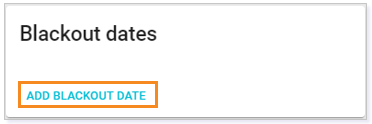
BLACKOUT DATES
Blackout dates can be set for the course. A blackout date might include a vacation day when school is not in session.
Click ADD BLACKOUT DATE to enter a new blackout date.
Enter the Name of the event.
Click on the dates to change the Start date and End date or click the calendar icon to select a date.
Click REMOVE THIS BLACKOUT DATE to delete it.
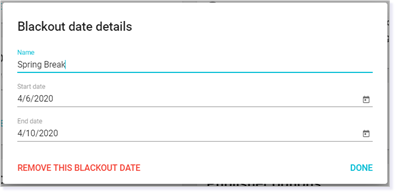
Click DONE when finished.
Once a blackout date is entered, it will appear on the Course settings page.
ADDITIONAL SETTINGS
In Grading periods, you can establish the grade weight for each portion of the year. For example, each quarter during the school year will account for 25% of the student’s grade for the year.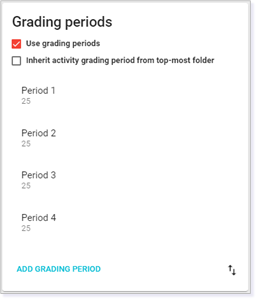
WARNING: If you turn on Grading periods, you will need to adjust each assignment to be associated to the appropriate grading period as each existing assessment will be auto-assigned to Period 1.
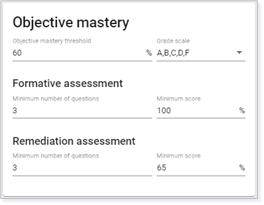
In Objective mastery, set the thresholds for mastering the objectives for the course and for Formative assessments and Remediation assessments.
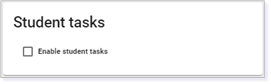
Student tasks give students permission to assign tasks themselves.
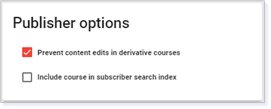
Publisher options are meant to help manage Master and Derivative courses.
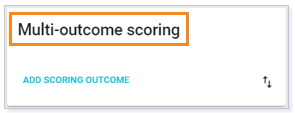
Multi-outcome Scoring will change the view from the Grades table to the Dashboard and Grades screens.
The Dashboard displays the student's overall score, course progress, and performance on objectives.
Grades displays detailed information for each activity including performance on outcomes, status, submission date, and due date.
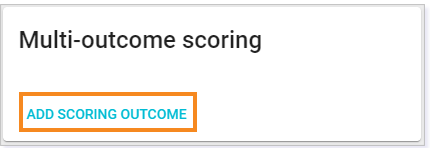
Click ADD SCORING OUTCOME to add multi-outcome scoring. The Scoring outcome detail form displays.
Type the Title of the scoring outcome.
Fill in the Description.
Change the color, weight, and percentage.
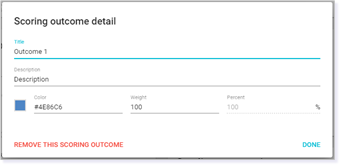
Click DONE when finished to save your changes.
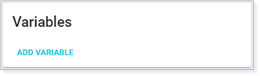
Variables allows you to create and manage replacement variables for the course.
Enrollment completion is the determination for the completion of the course.
Manual completion is when an end date is set for the course. All students will be expected to complete coursework by the date entered. This is a Lincoln Learning Solutions default.
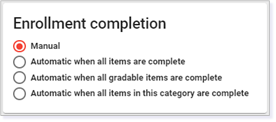
There are also options for Automatic when all items are complete, Automatic when all gradable items are complete, and Automatic when all items in this category are complete.
IMPORTANT: Enrollment completion is particularly important for those courses set up as continuous enrollment courses.
WARNING: Please keep Enrollment completion set to the default to ensure there is a seamless communication between the LMS and any associating SMS.
COURSE LINKS
For more information on Course Links, refer to the Adding Course Links article.
NOTE: Adjusting settings at the activity or assessment level may block global updates if applied, or updates must be applied manually post adjustment of settings at the activity or assessment level.
Please note, the images that may be found in this resource may not match your screen.
This is a Lincoln Learning Solutions product. Access/features may vary based on client contract.
© 2021 Lincoln Learning Solutions. All rights reserved.