This article explains the Edit, Preview, and More features in the Editor.
In the Editor, you can edit, preview, and move all lessons, folders, and activities within the course. You can access the editor from the Home page by clicking the Editor icon under the course card or clicking in the list view for the course you want to modify. You can also get to the Editor from the Main Menu by selecting the course and then clicking on the Editor icon.
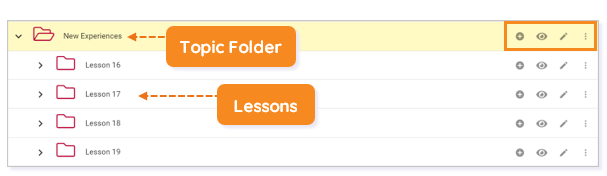
You can edit, preview, and move all folders and activities within your course. These adjustments are done by utilizing the icons located to the right of each folder and lesson.
EDIT
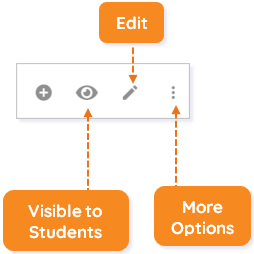
To edit an item, click the pencil icon. This opens the Activity Editor.

TIP: You can also double-click on an activity or folder to edit.
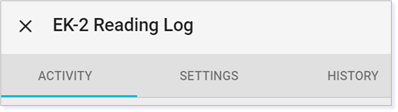
In the Activity Editor, you can edit information about the ACTIVITY and the SETTINGS. You can also view the HISTORY. To learn more about Activity settings, please consult the Activity Settings article.
IMPORTANT: Remember to click SAVE when you are finished making changes in the Activity Editor.
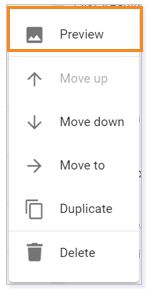
From the list of options, select Preview. This allows you to experience the activity in Activities as a student would. The activity will appear in the same tab/window in which you are working.
Hidden Activities
You can still preview hidden items. They will display in the same tab/window within the Activities area of Buzz but remain hidden from students.
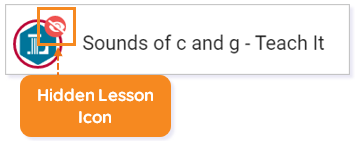
NOTE: In the Activities List, you will see an icon beside the activity title to show you the lesson is hidden.
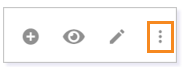
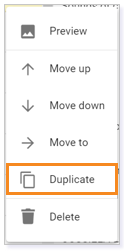
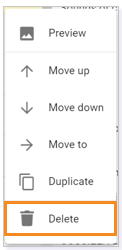
MORE OPTIONS
Move Up and Down
The More Options icon also lets you move the folder or activity up or down.
Click the Move Up arrow to move the folder/activity up one position in the course or the Move Down arrow to move the folder/activity down one position in the course. This feature is useful if you are moving the item to a nearby location.

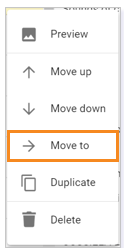
Move To
Click Move To to move the lesson to a new folder or place in the course.
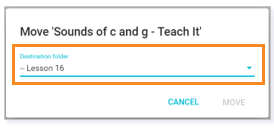
This opens a box where you can select a folder. Use the dropdown menu to select a place to move the lesson within the course. Click MOVE when you are finished.
TIP: You can also drag and drop an activity to a new location.
Duplicate
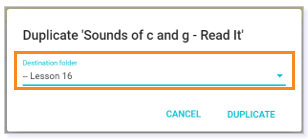
Click Duplicate to create a copy of the lesson.
This opens a box where you can select a folder for the duplicate lesson. Use the dropdown menu to select a place for the duplicate lesson. Click DUPLICATE when you are finished.
Delete
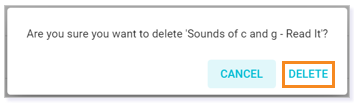
You can also choose to Delete a folder/activity. Click on Delete.
You must click DELETE to confirm that you would like to delete the folder/activity.
Restoring Deleted Activities
You should hide content within a course rather than delete it. Please read the Visibility article to learn more. However, if you delete content, you can still restore it. To restore a deleted item, please follow these quick steps.
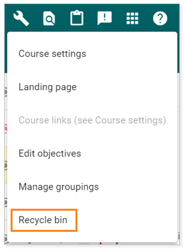
Go to the tools icon (wrench) and select Recycle Bin.
Select the item you want to restore and click the RESTORE SELECTED option. This should restore the activity.

Please note, the images that may be found in this resource may not match your screen.
This is a Lincoln Learning Solutions product. Access/features may vary based on client contract.
© 2021 Lincoln Learning Solutions. All rights reserved.