This article outlines various communication options available to teachers in their Learning Management System (LMS).
It is important to communicate with students for their continued growth and improvement. Take advantage of the communication options in the LMS to keep students informed. Information on the landing page will remain consistent, such as contact details. New information can be shared through announcements or messages for groups or individuals. Click on the type of communication to learn how to use it in your LMS.
There are other ways to communicate in your LMS, such as a homeroom or discussion boards. Visit the Adding a Homeroom into Your LMS and Discussion Boards articles to learn about the details.
Landing Page
The Landing Page is the first page you see when you open a course. Different LMS may have different options for landing page information. These are a great place to add static, meaningful information students will need to reference throughout the course such as your contact information, office hours, and more.
Click the LMS name below to navigate to that section.
If you do not see your LMS listed, visit your LMS help center for assistance.
TIP: For additional student support, please share this article with your students
Buzz
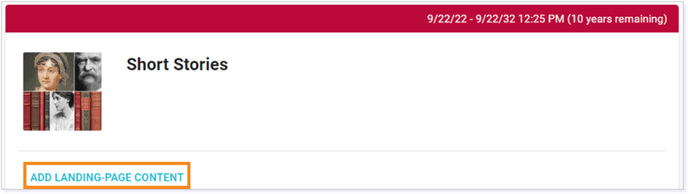
After opening the course, click ADD LANDING-PAGE CONTENT.
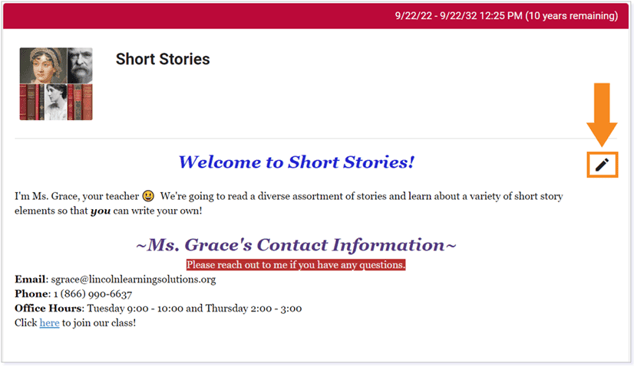
Once your Landing Page has been created, you can edit the page content by clicking the pencil icon.
Agenda
Located on the Course Home Page, the Agenda can highlight reminders and upcoming events for students.
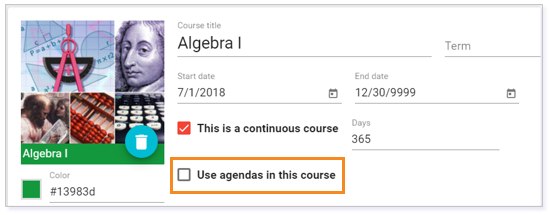
IMPORTANT: You must enable agendas from Course settings to use these features.
Under the Course title, check the box next to Use agendas in this course to enable the agendas feature. Then select SAVE in the upper right.
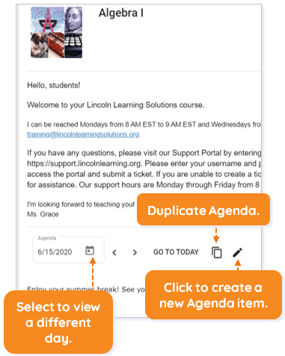
Add Agenda items by clicking the pencil icon. To use an item in another course, Duplicate the Agenda item by selecting the double square icon. To view a different week, select the Calendar.
You also have the ability to link a course activity, course resource, or website to the Agenda.
Visit How do I create agendas for my students? for information on creating and duplicating agendas.
Click here to return to the top of the article.
Canvas
In Canvas, you can set a landing page by changing the Home Page. There are different options for the Home Page landing. If you want a welcome page with contact details, then you will need to create a new page first and then change the settings for the home page.

First, follow the steps in the How do I create a new page in a course? resource to create a welcome page with your static information.

Then, follow the steps in Course Home Page Customization to set the welcome page as your landing page.
Click here to return to the top of the article.
Schoology
The landing page for Schoology can either be set to the Materials page or Updates. Follow the steps in the Set the Updates Area as the Default Landing Page for Your Course to change the landing page.

However, to set the Profile information, you can follow the steps in the article Profile to add your contact details.

Click here to return to the top of the article.
Announcements
Announcements allow you to send a message to individual courses or groups of courses. A good time to send an announcement is when there is a change in the content or schedule, a reminder of an upcoming due date, or other important information that is relevant to all students in the course(s).
Click the LMS name below to navigate to that section.
If you do not see your LMS listed, visit your LMS help center for assistance.
Buzz
Click the New Announcement icon in the Communication toolbar.

Select your course(s), set a start and end date, and type the subject and body of the announcement. To post the announcement, click POST in the upper right corner. Your announcement is now posted. You can edit or delete the announcement at any time.
- To edit an announcement, click on the pencil.
- To delete an announcement, click on the X.

NOTE: You can create announcements set to display in the future. However, it is recommended to use future announcements sparingly because searching for these posts can be difficult and you may not be able to apply updates i.e. seasonal announcements.
Visit How do I create announcements? for more information on this communication tool.
Click here to return to the top of the article.
Canvas
Create Announcements for your course by reviewing the article Announcements Overview. Post updates in your course to quickly communicate brief messages to your students. Once created, announcements appear on the Announcement page and any selected sections.

Schoology
You can use Course Updates to create announcements in your course. Post updates in your course to quickly communicate brief messages to your students. When updates are posted, they display in the Updates section and on each individual homepage of all members in your course.

Message Inbox
Teachers and students have an Inbox where they can compose, receive, and respond to messages.
Click the LMS name below to navigate to that section.
If you do not see your LMS listed, visit your LMS help center for assistance.
Buzz
An inbox icon on your main toolbar will contain a notification if you have any new messages.

IMPORTANT: There are limits associated with Messages feature.
- 60 KB message limit
- 1000 subject line character limit
Teacher
The two-way messages within an assessment (teacher feedback and student responses and questions) are also delivered to the Inbox with a direct link to the submission. This means students and teachers can be quickly notified of new messages and respond easily.

Teachers are able to edit or delete their messages.

Student
Students will be able to send a message from anywhere in their Buzz course. These messages are delivered to the teacher Inbox with a direct link to the activity or folder, so teachers can easily review the content students have questions or comments about.
Student are not be able to change or remove their messages after posting.

Observers
Parents, mentors, and other observers can access student messages, enabling them to be more involved in their student's learning success. Observers are automatically copied on all Buzz messages to their students.
IMPORTANT: Communication in Buzz is not delivered directly to an email address. This communication is fully within the system.
Inbox Notifications
Has message icon means that either the student, the teacher, or both have sent a submission or scoring message. You’ll have an inbox icon on your main toolbar with a notification of any new messages.

TIP: Under the Settings in Buzz, you can choose to set alerts for when you receive a message.

Using the Inbox
In the Inbox, you can use the filter to see messages from students in all courses or one particular course. The airplane icon will be used to create new messages.

IMPORTANT: If you are sending a message to more than one student, by default the message will be sent to each student individually. If you want it to send as a group message, check the box Send as group message (makes recipients and replies visible to everyone).

You’ll see that you have some typical inbox options under the Inbox dropdown.

NOTE: At this time, you can’t make additional folders or file messages within the Buzz inbox.
When viewing a conversation, you can use the three dots on the far right to change the Read/unread status and more.

Additional Buzz Resources
Click here to return to the top of the article.
Canvas
The Inbox messaging tool allows you to communicate with a course, group, individual student, or groups of students. A good time to send a message is when there is a change in the content or schedule, a reminder of an upcoming due date, or other important information that is relevant to all students in the course(s). You can also send a message to an individual student regarding an assignment or their performance.
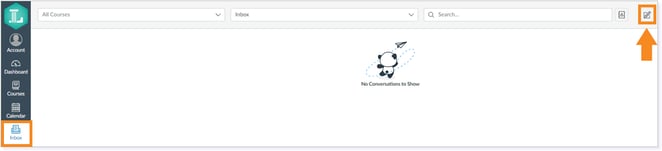
From Global Navigation, click Inbox and then click the pencil icon to compose a new message.
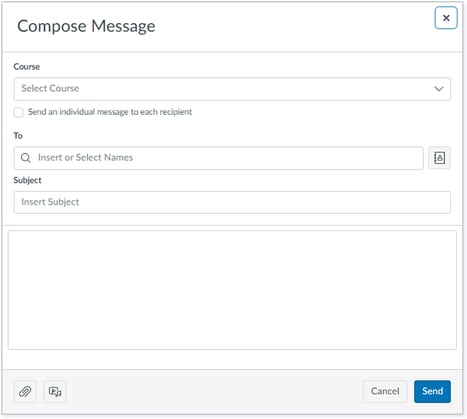
After you select your recipients, type the subject and body of the message. Click Send to deliver the message.
Additional Canvas Resources
How do I use the Inbox as an instructor?
Click here to return to the top of the article.
Schoology
Course and Group messages allow admins to send a Schoology message to all members of the course or group. A good time to send a message is when there is a change in the content or schedule, a reminder of an upcoming due date, or other important information that is relevant to all students in the course(s). You can also send a message to an individual student regarding an assignment or their performance.

Additional Schoology Resources
Click here to return to the top of the article.
Please note, the images that may be found in this resource may not match your screen.
This is a Lincoln Learning Solutions product. Access/features may vary based on client contract.
© 2025 Lincoln Learning Solutions. All rights reserved.